Understanding x-rays (radiographs)
Why take x-rays?
X-rays (correctly called radiographs) are essential for assessing changes in the feet following laminitis, and should clearly show the relationship between the hoof capsule and the internal structures of the foot to help the hoofcare professional.
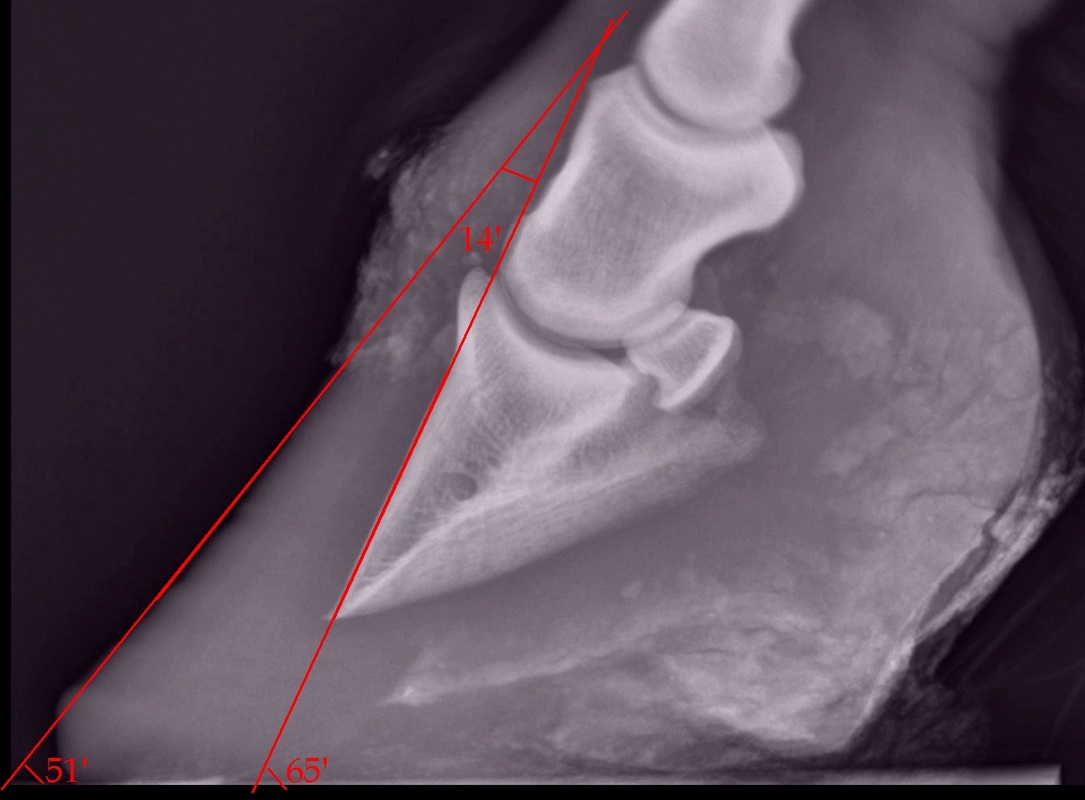
Correctly marked and positioned x-rays can be used to assess the severity of changes/damage, reach a prognosis, and monitor response to therapy, and are essential to guide the realigning trimming that is necessary if there is dorsal and/or palmar rotation.
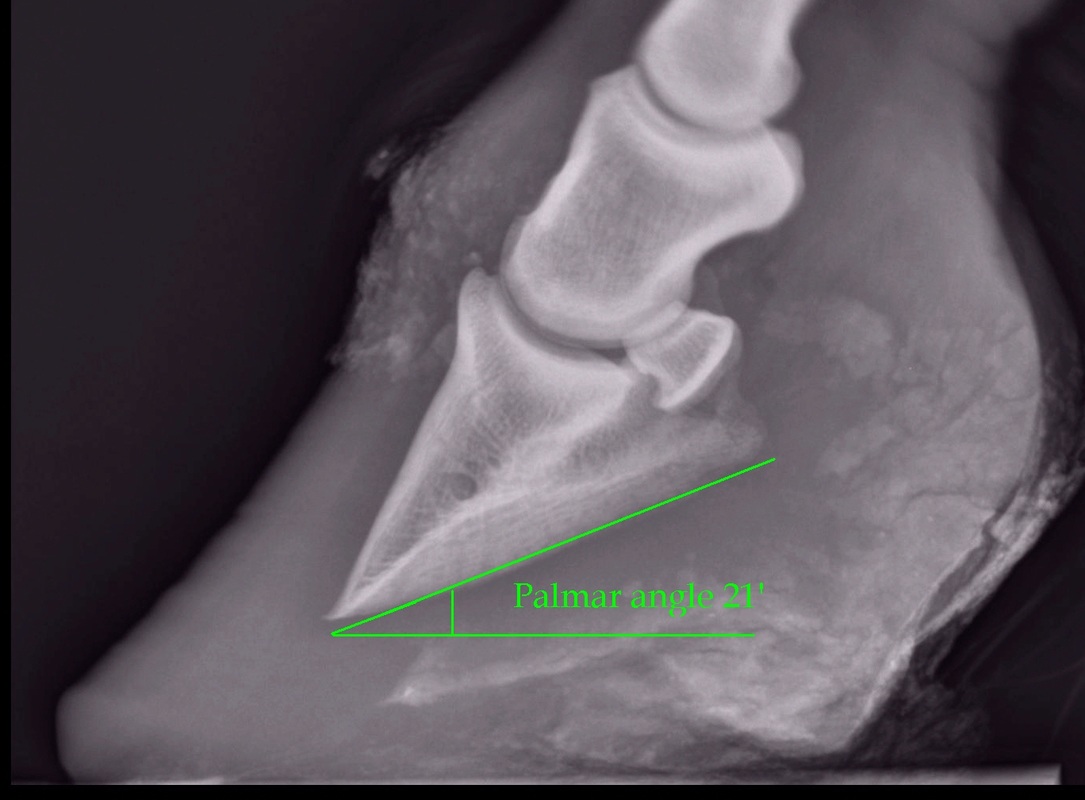
The lateromedial (LM) view is the most important x-ray of the foot to take after laminitis, and shows the relationship of the pedal/coffin bone (P3) with the hoof capsule, dorsal rotation, palmar angle, sinking/distal descent distance, sole depth, remodeling of the tip of P3, gas/fluid due to laminar separation or abscessing.
"The goal is to acquire an image that precisely defines the position of the hoof capsule and its relationship to the bone and to the ground" - Debra Taylor, p 234 Care and Rehabilitation of the Equine Foot.
How to take good x-rays - lateromedial (LM) image of P3
|
The feet should be thoroughly cleaned, and ideally reasonably well trimmed.
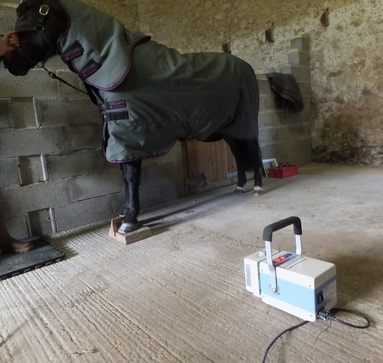
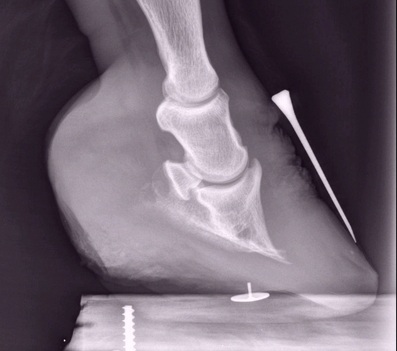
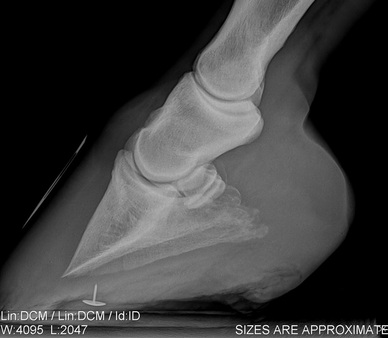
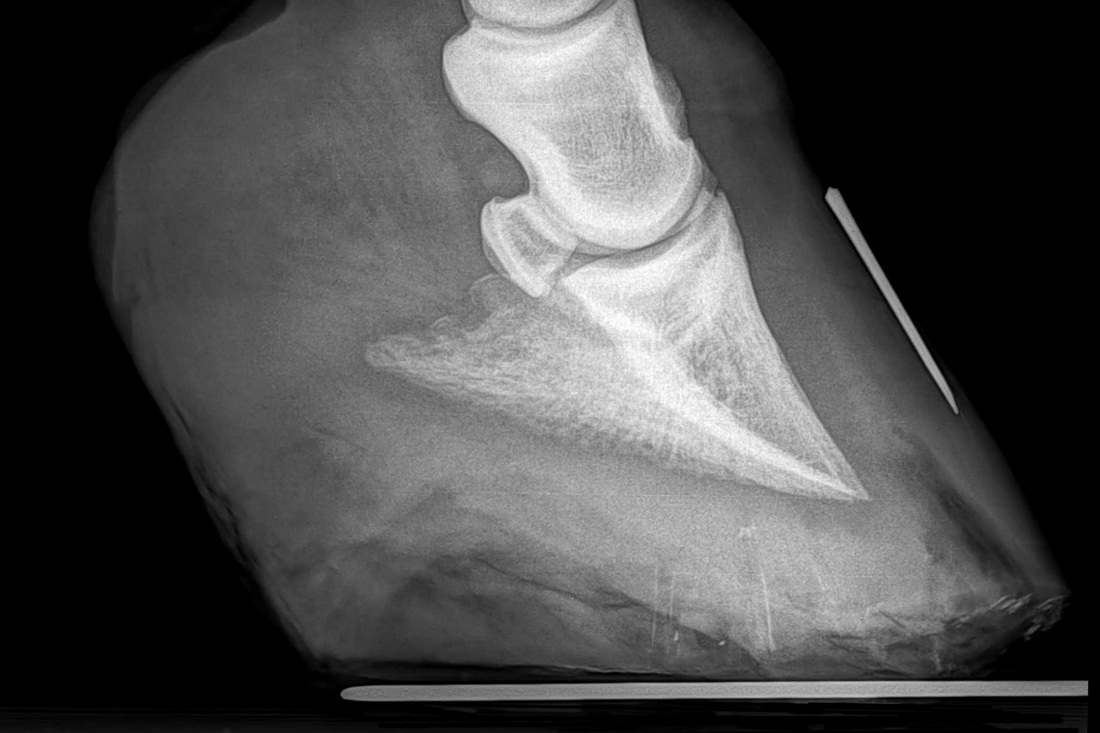
X-rays should be taken in a clean, dry area with a firm and level surface and an electricity supply. The horse should stand squarely with cannon bones perpendicular to the ground (this is essential if bony column rotation is to be evaluated). Both feet (fronts or backs) should be placed on equal height non-slip blocks (wooden blocks are commonly used) that are 1 cm lower than the primary beam of the radiograph machine. Blocks should have a radiopaque marker inlaid into the surface of the block to help identify the groundline and calculate the palmar angle and sole depth. The foot should be positioned parallel to the sides of the block to achieve a true lateral image. To reduce magnification errors, the foot should be placed as close as possible to (ideally touching) the x-ray cassette. |
The radiograph machine should be positioned on the floor with the primary beam exactly midway between the toe wall and the heel bulbs, 1-2 cm above the surface of the hoof block/at least 2 cm below the coronary band, and parallel with the heel bulbs and the ground surface. In a normal foot this view should have both sides of the bottom of the foot and both wings of the pedal bone superimposed on each other, giving a 2D image.
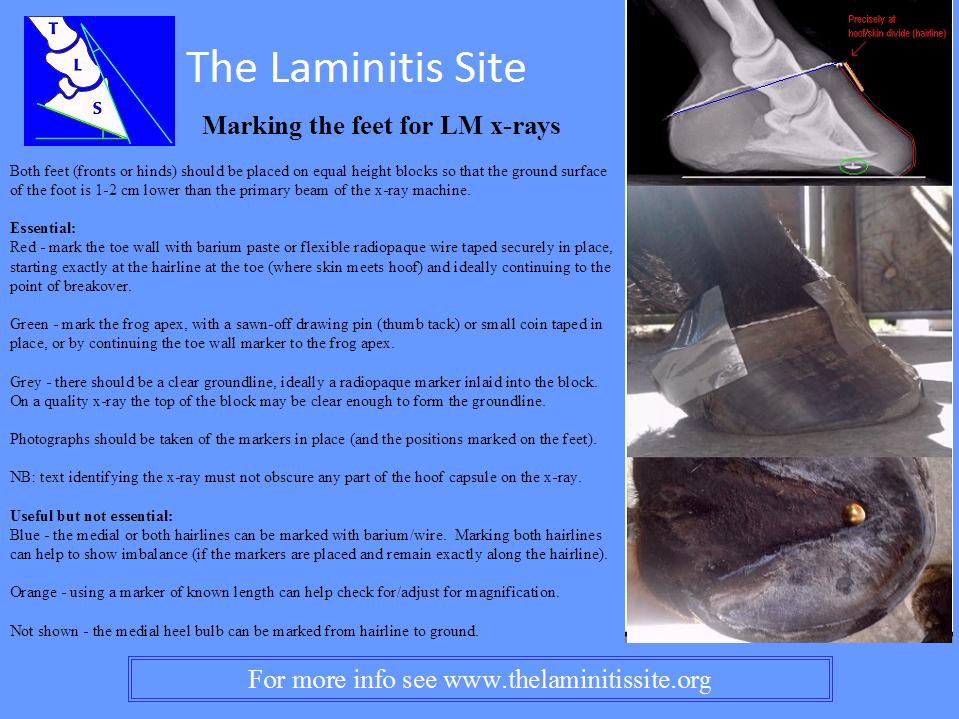
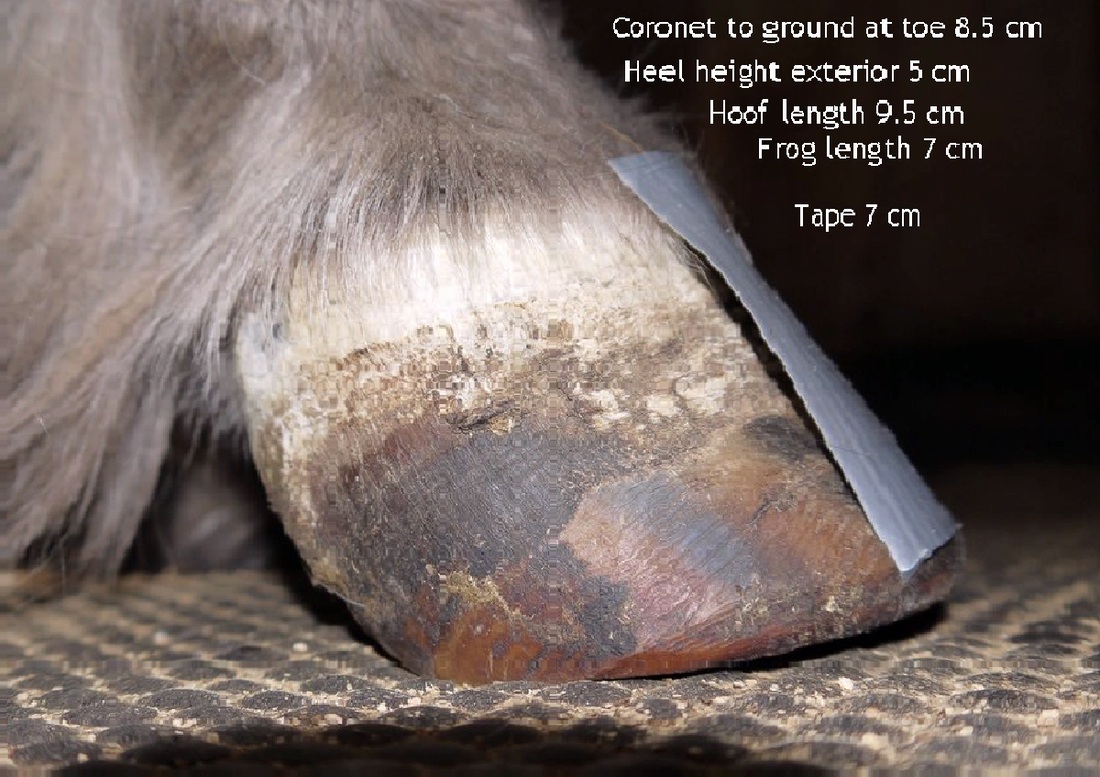
For the LM view, the foot should be marked and photographs taken of the markers in place (and ideally the positions of the markers drawn on the foot).
Essential markers:
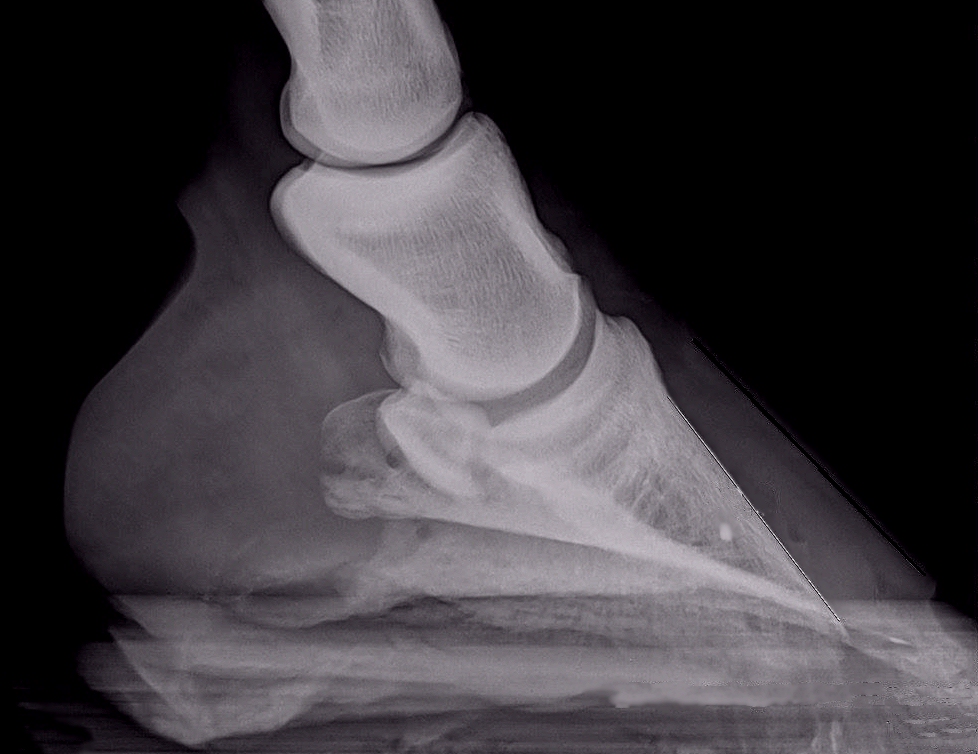
- The toe wall should be marked - using barium paste (ideal as barium paste follows the contours of the foot) or flexible radiopaque wire cut to the required length and taped securely in place - starting exactly at the hairline (where skin meets hoof) and ideally continuing to the point of breakover. This allows dorsal rotation, hoof wall thickness and sinking distance/distal descent to be measured, and helps to identify any area where the toe is parallel to P3 that can be used to define the true toe line during realigning trimming.
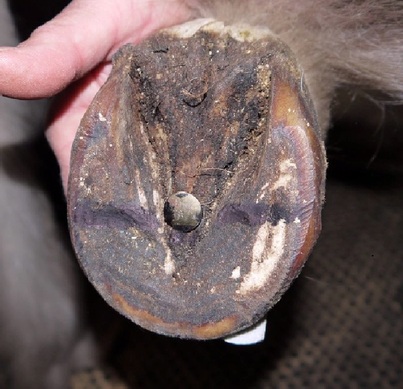
- The frog apex should be marked - with a sawn-off drawing pin (thumb tack) or small coin taped in place, or by continuing the toe wall marker to the frog apex. The frog apex often stretches forward past the true frog apex after laminitis. Identifying whether the frog apex is true or stretched forwards can help guide the realigning trim and gives a reference point on the bottom of the foot.
Useful but not essential:
- The medial or both hairlines can be marked with barium/wire. Marking both hairlines can help to show imbalance (if the markers are placed and remain exactly along the hairline).
- The medial heel bulb can be marked from hairline to ground.
- Using a marker of known length can help check for/adjust for magnification.
The feet should not be packed (with e.g. Play-doh) for LM x-rays as packing is likely to obscure sole depth and solar concavity.
When the x-ray is saved, there must be no text obscuring any part of the hoof capsule on the x-ray - all identifying text should be placed outside of the object being x-rayed.
|
The true frog apex (found by gently trimming the frog to reveal the seam between sole and frog) can be marked with barium or with a sawn-off drawing pin.
It can be useful to mark the position of the sawn-off drawing pin on the sole before removing it, and to take a photo showing the position. |
If possible, always take photographs of the foot in position at the time of the x-ray, showing the markers in place - for correct interpretation of the x-rays questions will be asked such as was the medial quarter of the hoof touching the cassette (if not, hoof wall thickness cannot be measured), was the horse equally weight bearing and were the cannon bones vertical (if not, bony column rotation cannot be measured) - much easier to rely on photographic evidence than memory!
Interpreting x-rays
|
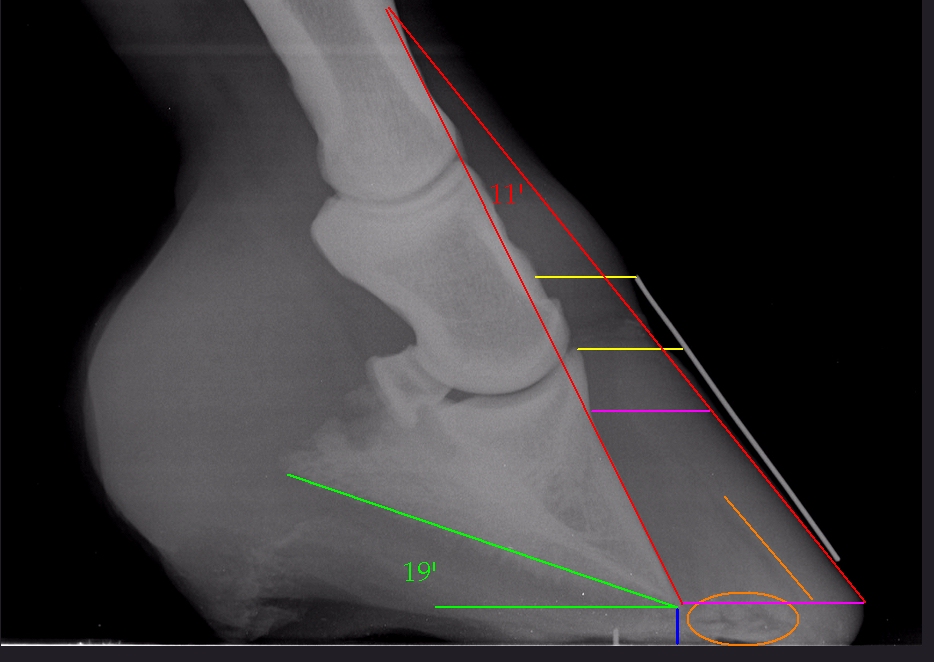
Marking the hairline and wall at the toe allows calculation of the amount of sinking (technically referred to as the coronary band:extensor process distance or CE) – yellow, the dorsal angle of rotation – red, and the difference in dorsal horn and lamellar tissue thickness at the top and bottom of the pedal bone (hoof:lamellar zone) – pink.
A clear ground line enables the palmar angle – green, and sole depth – blue, to be calculated. Marking the apex of the frog provides an important reference for trimming, and helps to determine whether the apex of the frog is “true” or has grown forwards. An x-ray may also indicate areas of gas or fluid – orange (this horse was developing a sub-solar abscess), whether there has been remodelling of the pedal bone, and whether rotation is capsular and/or bony. |
Joint spaces
Contino EK, Barrett MF, Werpy NM
Effect of limb positioning on the radiographic appearance of the distal and proximal interphalangeal joint spaces of the forelimbs of horses during evaluation of dorsopalmar radiographs
Journal of the American Veterinary Medical Association May 15, 2014, Vol. 244, No. 10, Pages 1186-1190
https://doi.org/10.2460/javma.244.10.1186
"Forelimb position significantly affected the mediolateral joint balance of the interphalangeal joints of horses. Thus, it is crucial that the forelimbs of horses be squarely positioned when dorsopalmar radiographs are obtained for accurate evaluation of interphalangeal joint space and balance."
Bony rotation
Craig JJ, Craig MF, Savoldi MT, Waldsmith JK
Locating Rotation Centers of the Equine Digit and their Use in Quantifying Conformation
This research suggests that the "normal" bony column (P1, P2, P3) is not straight.
Forelimb position significantly affected the mediolateral joint balance of the interphalangeal joints of horses. Thus, it is crucial that the forelimbs of horses be squarely positioned when dorsopalmar radiographs are obtained for accurate evaluation of interphalangeal joint space and balance.
Assessment of a 0 degree DP x-ray by Daisy Bicking of Daisy Haven Farm.
What can go wrong - good v bad x-rays
Dirt on the foot may show as an artifact.
Long walls and overgrown sole and frog may show as gas artifacts (dark areas).
Edge burn-through (saturation artifact) at the edge of soft tissues is a common artifact on digital x-rays (hence correctly marking the feet is important).
Marking the feet is essential - many vets using digital equipment feel this is no longer necessary. It is. Valuable information will be lost if the feet are not correctly marked.
Definitions:
Artifact - a positioning artifact is the appearance of a structure on the x-ray that doesn't really exist in the part of the body x-rayed, and is usually caused by an incorrect relationship between the x-ray machine, the cassette or the horse.
Further Information
Examples of foot radiographs
Imaging Anatomy Website - College of Veterinary Medicine University of Illinois
Radiographs of different views of 3 horses' left front feet
Equine distal limb normal radiographic anatomy - Karl L Anderson University of Minnesota
Equine Radiography: Positioning Techniques & Tips for Acquiring Good Images - Shalyn J Crawford, 2015
Textbook of Veterinary Diagnostic Radiology - Donald E Thrall 2013 p 245-247
Explaining Laminitis and its Prevention - Robert Eustace: X-ray technique
Laminitis Radiology - Chris Pollitt
The Phalanges
Radiography - John the Vet
Radiographic Examination of the Equine Foot - W Rich Redding
Radiography and radiology of the equine foot - R Weller - 50th BEVA Congress 2011
O'Brien's Radiology for the Ambulatory Equine Practitioner - Timothy R O'Brien (2005)
Atlas of Diagnostic Radiology of the Horse - Diseases of the Front and Hind Limbs - Kees J. Dick and Ilona Gunsser
